


LIFT EXPO ALGERIA 2024
2024-03-19
(Summary description)Handrail Operation Instruction
《Equipment for Handrail 》
Preparation before vulcanization

(Summary description)Handrail Operation Instruction
《Equipment for Handrail 》
Preparation before vulcanization
(1)Length Calculation:
a:Ordared of steel standard splicad length
L (m) + 280( mm) = cutting length
b:Diagram Form
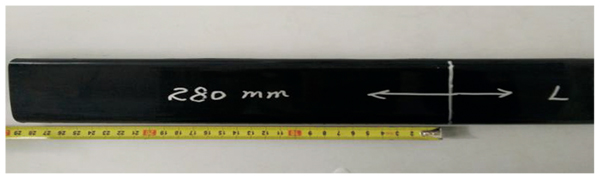
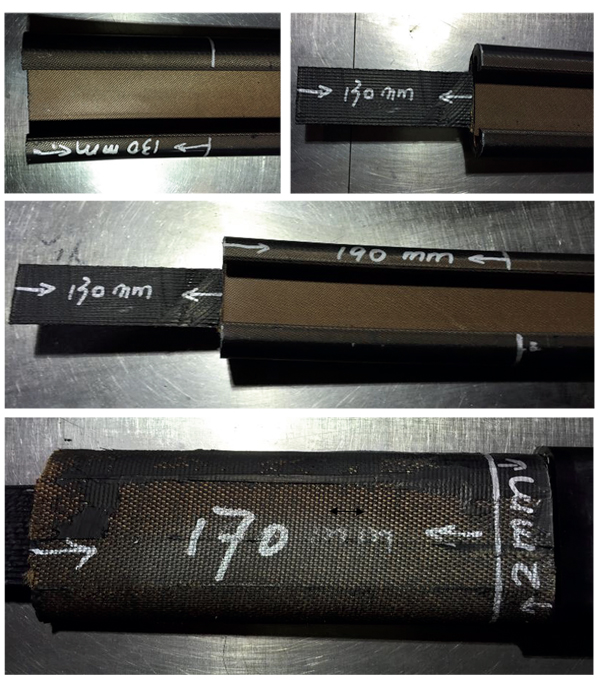
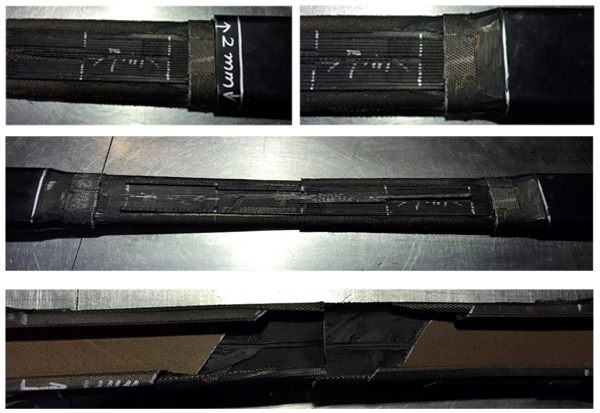
(2)280mm end (Male end) processing
1.Mark at the distance of 130mm from the opening of 280mm section, remove rubber, sliding layer, and PE inner layer keep the 130mm dislance cord.
2. Peel rubber of the picture marked 190mm distance
a: Before peellng
b: After peellng
3. Remove the PE inner layer of the170mm section, keep steel cord, and then divide it into 4 sections with 70mm length for each from the opening
4. From the opening end, first 70mm distance left 2 steel cords, second mm distance left 6 steel cords, third 70mm distance left 10 steel cords while the last 70mm distance left 14 steel cords
5. Turn over the handrail to keep sliding layer upper and mark 60 degree as following picture shown
6. Cut the sliding layer along with 60 degree direction
After processing:
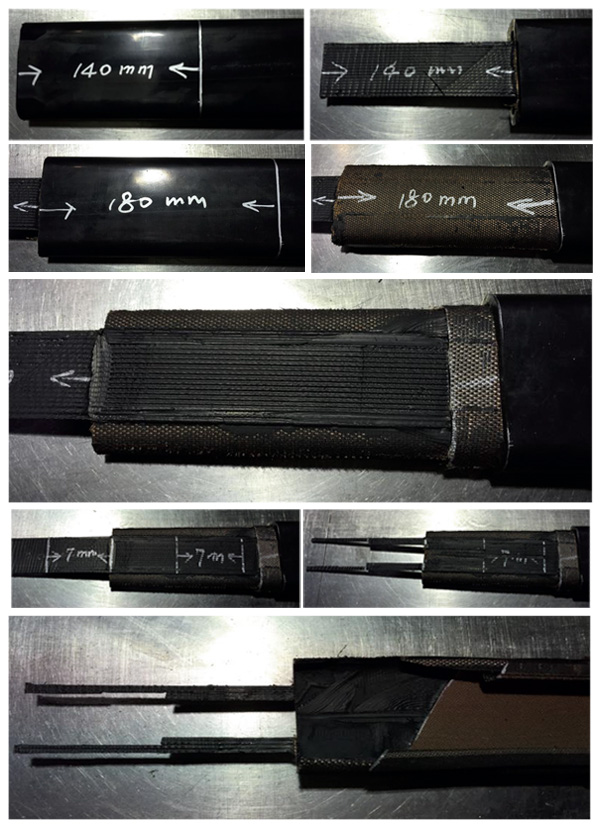
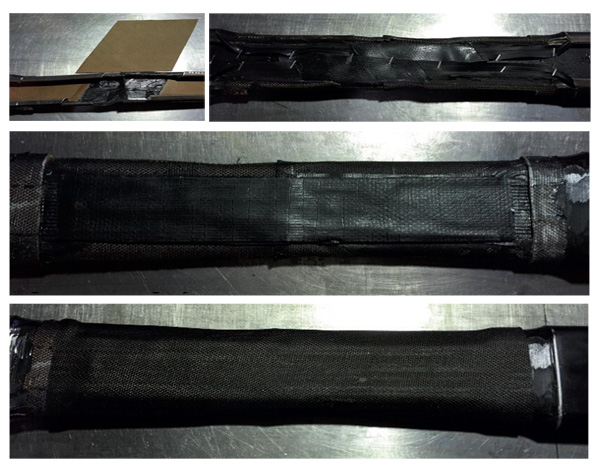
(3)140mm end( female end)processing
1. Mark at the distance of 140mm from the opening, remove rubber sliding , and PE inner layer keep the 140mm distance cord.
2.Peel rubber of the picture marked 180mm distance
a:Betore peellng
b: Arter peellng
3. Remove the PE inner layer of the160mm section, keep stecl cord
4. Divide it into 4 sections with 70mm lenght for each from the opening
5. Cut the steel cords as following for each 70mm section
6. Turn the handrail to keep sliding layer upper and mark 60 degree as tollowing plcture shown
7. Cut the sliding layer along with 60 degree direction
8. Diagonally cutting at 20mm rubber marked position
Cut and peel period finished
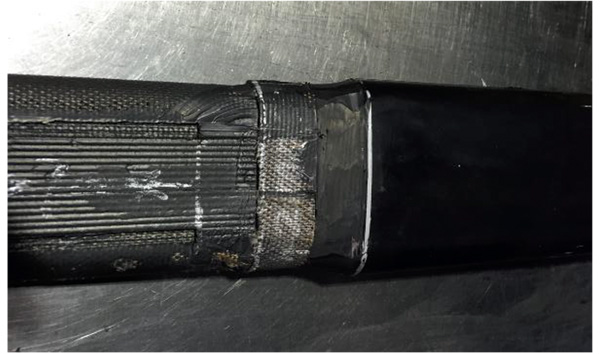
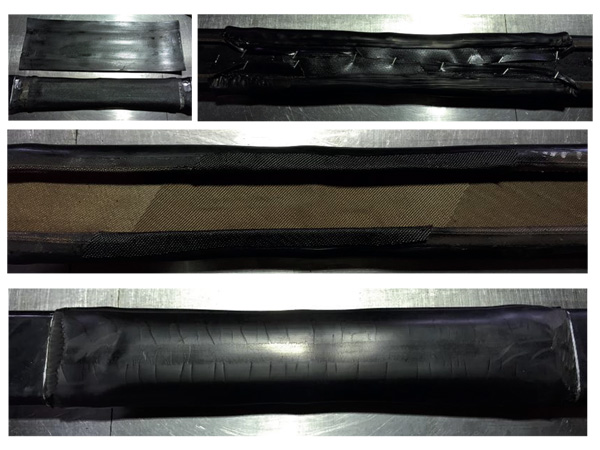
(4) 180mm/ 140mm end (malefemale end)connecting
1. layer red side:
(1) Brush CR24 ; (2) Put NR17rubber sheet with 12mm length
2. Brush CR24 glue at black side of the sliding layer that need splice
3. Connect sliding layer after completely drying
4.Choose the proper mould insert and put it on the sliding layer centered, then fix it by nail
5. Brush CR24 glue at nail side after drying turn over and brush the other side
6. Paste PE270 inner layer centered at the reverse side and connect 12mm distance with the original handrail, roll tightly.
7. Paste NR17 rubber sheet on PE270 inner layer.
8. Brush CR24 glue on the steel cords of the two sides and wait till dry
9. Put male/ female end in line successively:
(1) Sort next to; (2) Roll tightly; (3) Brush CR24 glue; (4) Paste 300mm enhanced fabric
*For every step, glues dry completely and roll tightly
10.Brush CR24 glue on enhanced fabric, paste the second PE270 inner layer after completely drying and connect 12mm distance with the original PE, roll tightly
11. Rubber connecting
(1) Brush CR24 glue on PE270
(2) Brush CR24 glue on ripe rubber bevelling
(3) Brush CR24 glue on inner side of new rubber
(4) Paste the rubber after all naturally dry, connect 3-4mm dlstance roll tightly
(5) Take off the fixed nail and remove the mould insert
(6) Brush CR24 glue on black side of sliding layer and edge/ lip position of rubber
(7) Turn under sliding layer to rubber lip and roll, brush CR24 glue on red side
(8) over to keep rubber side upper, cut the unripe rubber diagonally
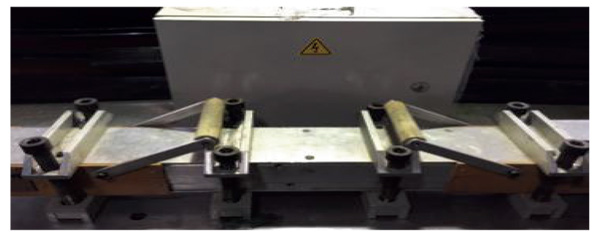
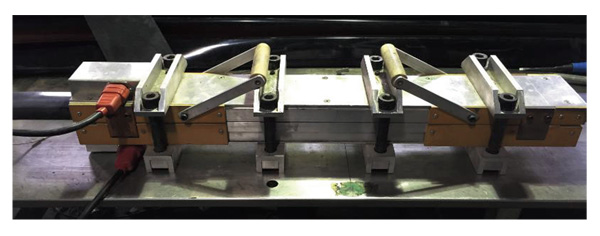
(5) Preparation before vulcanization
1. Connect the heating base of controller box to mould, then plug the temperature sensor
2. Connect with 220V power supply
3. Turn on the controller box, and adjust the temperature to 80 degree, and wait the
mould/ insert of mould to increase temperature
4.Cleaning of mould and insert
 (6) Mould pressure adjust during vulcanization medium-term
1. When mould/ insert reaches 80 degree, the unripe handrail stacks up the heat-resistant paper centered and put into insert
2. Put the unripe handrail and insert into the lower mould, and close the upper mould
3. Screw on the fastened bolts till upper/ lower mould is appressed, and the distance is uniform
4. When the upper/lower mould is appressed, then release all the bolts, and take away the upper mould temporary
5. Set the temperature control device to 160 degree
6. Tear off the heat-resistant paper, and mend the extra softened rubber rapidly

(7) Normal vulcanization
1. Close the upper mould after mending the extra rubber
(1) First slightly fasten the middle 4 bolts, then bolts on the two sides
(2) Then fasten all the bolts tightly so that the joint horizontal force is balanced
(3) When the joint line distance is around . 5mm, stop fastening bolt
(4) Begin to vulcanize for 25 minutes when the temperature reaches 160 degree
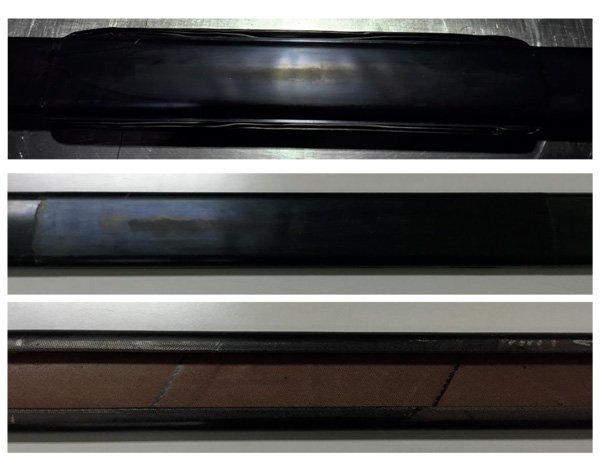
(8) Adjust for handrail
(1) Turn off the controller box after it fully vulcanizes for 25 minutes under 160 degree. Then cool for 30 minutes and release the bolt
(2) Take out handrail and remove the wasted material on two sides with knives
(3) Slight polish with abrader if two sides of the rubber is not at the same level
a) Wait till completely cooling of handrail
b)Order of sand paper polishing : 120#、60#、30#、15#sand paper
c) Polish with woolen ball
Scan the QR code to read on your phone
News More
MESSAGES
CONTACT US
> Contact Person: Sean Lee
> Phone: +86 20 8304 1994
> Fax: +86 20 8304 1967
> Whatsapp: +8613924192218
> Email: info@deysse.com
> Web: http://www.deysse.com
> Address: Room 2801-1,Jinhui Building,No.123 Jiefang South Road,Yuexiu District, Guangzhou, 510120 China
Copyright © 2021 Guangzhou Deysse Elevator Fittings Co., Ltd All Rights Reserved. privacy protection


